Section 1
1 Tools
2 Lines
3 永 ei
4 本 hon
5 自 ji
6 由 yuu
Section 2
7 主 shu
8 月 tsuki
9 花 hana
10 岩 iwa
11 友 tomo
12 目 me
Section 3
13 耳 mimi
14 手 te
15 米 kome
16 国 kuni
17 光 hikari
18 空 sora
Section 4
19 見 ken
20 天地 tenchi
21 春風 harukaze
22 克己 kokki
23 洗心 senshin
24 喜 ki
Section 5
25 ア a カ ka
26 サ sa タ ta
27 ナ na ハ ha
28 マ ma ヤ ya
29 ラ ra ワ wa
30 濁点 dakuten
Ritchie & Kathy
Names
Lesson 1 - Tools and Technique
In this first lesson we are going to explore the four basic tools of Japanese Calligraphy and discuss their usage and care. This lesson provides an overview of the tools while also discussing what one should look for and what one should avoid when purchasing these tools. Remember that it is less important to have the best tools and more important to have tools that simply work well.
Introduction
In visiting a temple in Japan, it is not uncommon to see a calligrapher carrying a bundle of old brushes. This is part of a ceremony called Fude Kuyo that dates back hundreds of years. Japanese believe that there is a spirit in all things and the brush is no exception. You won't see or hear of a calligrapher that when done with a brush will simply throw it in the trash can. Rather brushes are taken to a temple and with reverence the spirit of the brush is thanked for its long service and in a ceremony the brush is cremated.
It is with this respect that one should begin the task of acquiring tools for calligraphy. A brush does not have to cost several hundred dollars to deserve respect - a fifteen dollar brush that will be your companion for many years is just as deserving and perhaps more so as it will be your first and thus will silently suffer more abuses.
A Note on Terminology
For many common words terminology is consistent amongst all calligraphers. As an example a brush is called fude without exception. However, for details like the name of a particular stroke each school and even each teacher will have a different name for the same thing.
I will use the terminology that I am familiar with and will use this consistently throughout the entire course. I would like to caution that these names are not universally used, but these names will be used consistently throughout this program.
Lesson 1 Vocabulary
In this lesson we will be discussing the words in the following list. Click on the link in the Romaji column to hear the word pronounced. It is not important to memorize these at this point as we will be using these throughout the program. Also be sure to refer to the glossaries in the library.
| Romaji | Hiragana | Japanese | English |
| bunchin | ぶんちん | 文鎮 | Paperweight |
| dango | だんご | 団子 | Round Dumpling |
| fude | ふで | 筆 | Brush |
| fudejiku | ふでじく | 筆軸 | Brush Handle |
| fudemaki | ふでまき | 筆巻 | Brush Holder |
| fudeoki | ふでおき | 筆置 | Brush Rest |
| gampi | がんぴ | 雁皮 | gampi (washi material) |
| goumou fude | ごうもうふで | 剛毛筆 | Stiff Bristle Brush |
| hanshi | はんし | 半紙 | 9 1/2" W x 13"H paper |
| juumou fude | じゅうもうふで | 柔毛筆 |
Soft Bristle Brush |
| kami | かみ | 紙 | Paper |
| kasure | かすれ | 掠れ | |
| kengou fude | けんごうふで | 兼豪筆 | Mixed Hair Brush |
| keshou nori | けしょうのり | 化粧糊 | Weak glue to form brush tip |
| kofude | こふで | 小筆 | Kana Brush |
| kouzo | こうぞ | 楮 | kozo (washi material) |
| kyuujuuken | きゅうじゅうけん | 歙州硯 | Type of Suzuri |
| mitsumata | みつまた | 三椏 | mitsumata (washi material) |
| nachiguro | なちぐろ | 那智黒 | Type of Suzuri |
| nihon-ken | にほんけん | 日本硯 | Japanese Suzuri |
| nijimi | にじみ | 滲み | |
| riku | りく | 陸 | Land (refers to grinding area of ink stone) |
| ryuukeiken | りゅうけいけん | 龍渓硯 | Type of suzuri |
| shitajiki | したじき | 下敷 | Calligraphy Pad |
| suiteki |
すいてき |
水滴 | Drop of Water |
| sumi | すみ | 墨 | Sumi (Indian) Ink |
| sumioki | すみおき | 墨置 | Sumi Rest |
| suzuri | すずり |
硯 |
Ink Stone |
| tankei | たんけい | 端渓 | Area in China famous for Suzuri. |
| tankei-ken | たんけいけん | 端渓硯 | Suzuri from Tankei |
| umi | うみ | 海 | Ocean (refers to ink well area of the ink stone) |
| urauchi | うらうち | 裏打ち | Backing art onto heavier paper |
| washi | わし | 和紙 | Japanese Paper (Washi) |
| yokoga | よこが | 横画 | Horizontal Line |
| youmou fude | ようもうふで | 羊毛筆 | Goat Hair Brush |
Calligraphy Tools
There are four essential tools for Japanese Calligraphy which are:
2) Ink (sumi) 墨
There are also five additional tools for which an inexpensive substitutes will do fine:
5) Calligraphy pad (shitajiki) 下敷
A piece of felt larger than the paper will do. The felt can be purchased by the yard at a fabric store and should cost about $5 or less. The Japanese shitajiki will generally be thicker than what may be purchased at a fabric store.
6) Water Vessel (suiteki) 水滴
A small bowl and a teaspoon will work fine.
7) Paperweight (bunchin) 文鎮
Almost anything that is long and relatively thin and has some heft to it can be used. The item must be clean and must distribute its weight well.
8) Brush Rest (fudeoki) 筆置
Use anything that will keep the bristles from contact with the table.
9) Sumi Rest (sumioki) 墨置
Often the ink stick will be place on the upper right corner lip of the ink stone at an angle.
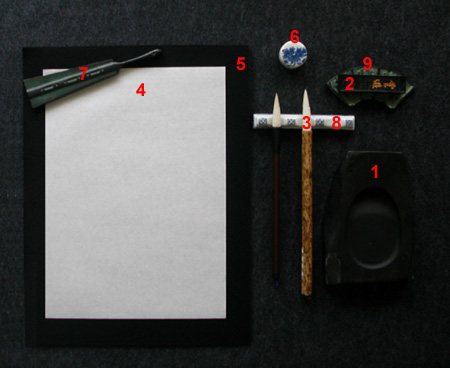
The following diagram shows the tools and usual placement. Each item is discussed in detail later in this lesson along with enlarged images. Note here the names and the relative position of the items.
Tool Layout
1. Suzuri
2. Sumi
3. Fude
4. Kami
5. Shitajiki6. Suiteki
7. Bunchin
8. Fudeoki
9. Sumioki
IMPORTANT: In almost all of the videos we have placed the suzuri next to the paper and the brushes to the far right. Our intention in doing this is to clearly show proper technique for inking the brush and having the suzuri near the paper made this possible. In your own work, please be sure to use the above layout.
The suzuri or ink-stone is made of a hard stone and can be logically divided into two parts called the ocean (umi) and the land (riku). The ocean is used to hold ink that is prepared and the land area is used to prepare or grind the ink.
The surface of the land area looks perfectly flat, but it actually has a texture like extremely fine sandpaper. This texture is very important to preserve as it is this texture that extracts the ink from the ink stick. If this surface is damaged it will be difficult to create a good ink.
Recently a ceramic ink stone has come out. These are light and inexpensive though because they do not have the right surface texture they are difficult to use. In general one should always purchase a natural stone.
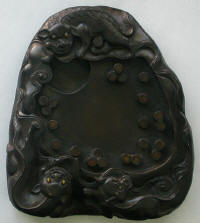
The larger the ink stone the better. About 4" W (9.5cm) x 6" H (15cm) should be the minimum size for use with calligraphy. The ink stone should not be all decoration. The majority of the surface area should be reserved for preparing the ink. If you would like an intricate stone carving of a dragon, then buy an intricate carving of a dragon. When purchasing an ink stone, purchase an ink stone suitable for preparing ink.
There are a large number of stone types varying in quality and price. One should purchase a stone from a reputable dealer. For the beginner the highest quality stone is not required but it is important that the serious student have a stone that will last and that the stone be something that the student treasures. One should not buy a stone that one considers junk and not treat properly.
Be careful when buying an ink stone from an unknown source. There are many poor quality ink stones for sale for a price that far exceeds their value. Some of the ornate stones one sees for sale are not actually stone at all but rather are formed using concrete or plaster which is then covered with a black coating. If when inspecting an ink stone you see white where the black covering has been chipped then this is not stone and is not suitable for calligraphy.
Caring for the Suzuri (Ink stone)
When the suzuri is first purchased, rinse the stone in water and use your fingers to clean the surface. Thoroughly dry the stone with a soft cloth or paper towel. Do not use anything that will scratch the surface. Also keep the suzuri and all of your calligraphy tools covered when not in use.
When finished using the suzuri, remove the excess ink with a paper towel. Do not let the ink dry before washing. Wash the suzuri with your fingers, a soft fabric, or a paper towel. Use plenty of water as all of the ink needs to be removed. Once washed, thoroughly dry the stone with a soft cloth or paper towel. Do not use anything that will scratch the surface. The suzuri should then be covered so it will not collect dust and should be stored in a location where it will not be bumped or damaged.
A suzuri that is treated well will last a lifetime.
Suzuri (Ink Stone) Samples
|
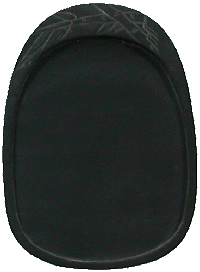
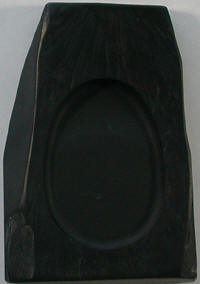
Hand-carved Natural Stone 4 1/4" W x 5 3/4" H This is a very nice stone. When holding it one can feel its weight. There is a nice land to ocean ratio and the surface is perfect for grinding the ink. The simplicity of the design is quite nice. This is called ryuukei-ken |
|
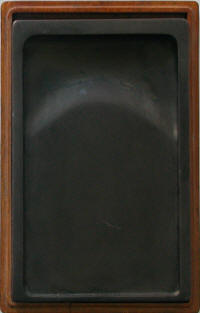
Hand-carved Natural Stone 3 5/8" W x 5 1/4" H This also is a very nice stone. This is a Chinese ink-stone called Tankei and is noted for its purplish tint. This stone is a little more ornate than the one shown above, but not overly so. The ocean area is a little small for the size and so this stone is nice for smaller works. |
|
Hand-carved Natural Stone 4 7/8" W x 6 7/8" H This is a very nice Japanese style stone called Nihon-ken (ken is another reading for suzuri). The image makes this difficult to see but it is a jet black stone called nachiguro. |
|
Hand-carved Natural Stone 5" W x 7 7/8" H This is a very nice stone. This is a Chinese ink-stone called Kyuujuu-ken which is a black stone with a slight hint of green. It is a simple design and is quite good for medium sized works. This is similar to the stone that I use most often which is 5 3/4" W x 8 3/4"H. |
|
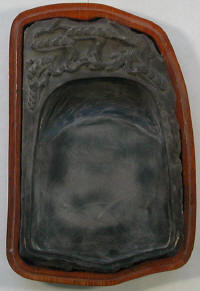
Hand-carved Natural Stone 5 3/8" W x 8 1/2" H This is a very nice stone. The carving is nice and makes the entire stone enjoyable to use. This is also a Tankei-ken from China. |
|
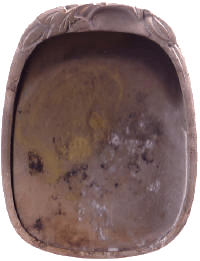
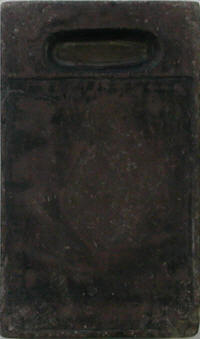
Antique Hand-carved Natural Stone 3 3/8" W x 4 1/2"H This stone was found in an excavation of a rubbish pit of an old Hawaiian plantation. I can't imagine who used it or why it had to be discarded. Most probably it was brought from Japan by farmers that emigrated to Hawaii to work the cane fields. |
|
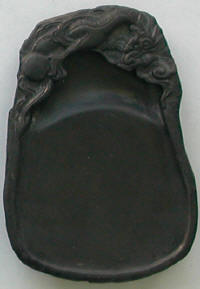
Antique Hand-carved Natural Stone 3 7/8" W x 6 1/2"H This stone is from China and said to be over a hundred years old. The land area has been so heavily used that the stone is worn away. When I first saw the stone it was all black, after carefully cleaning the stone showed a wonderful purple tint. Notice that the ocean area is small and not directly connected with the land so the usage would be different from what we use today. |
|
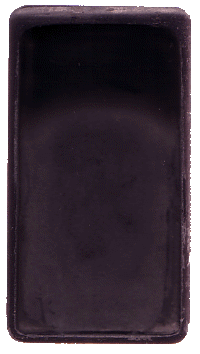
Fake Suzuri (Covered Plaster) 8"W x 9"H If you are spending a significant amount of money on an ink stone, be sure that you are able to inspect it closely. You may relax this rule if you are buying it from a known and reputable dealer. The stone above looks fine in the photograph, but on closer inspection one can see that where the stone is chipped, the stone underneath is in fact pure white. This means that a plaster or cement was covered with black enamel or other material to make this appear like a high priced stone. This stone was created specifically to deceive. At one store I pointed out to the owner that a high priced stone was in fact fake and should not be sold as such. I pointed out the chipped area and the white cement underneath. Later I returned to find that a black magic marker had been used to cover the defect and the stone was still out for sale with the price unchanged. This is a classic example of why one should be careful when purchasing ink stones on-line at auction sites and from unknown sources. |
One will see sumi ink in both a stick form and in liquid form called bokujuu. Ink sticks are often said to be important because the grinding of the ink stick is an integral part of the mental preparation for the act of writing. This is certainly true and the mature calligrapher will recognize the preparation of the ink as an integral part of the artwork. Perhaps this process can be compared to warming up for the athlete.
However, there is another even more important reason why one should grind one's own ink and this is a bit more involved to describe. Calligraphy is done on Japanese paper that is rather thin. The reason being that one wants to have complete control over how the ink will be absorbed into the paper. At times one will want a blotting effect showing a pause and at times one will want an effect where the brush runs out of ink making a complex set of lines showing movement. These effects are known respectively as nijimi and kasure. The downside of this amount of control is that the thin paper will wrinkle when the ink dries. To counteract this, once the calligraphy is dry, the paper will again be lightly wetted and with a thin glue the artwork will be backed onto a stiff paper that will provide the mechanical strength for the artwork. This process is called urauchi and for the finest artwork this process is a must. Because of the electrochemical bonds, ink ground from the ink stick will survive this wetting process with no ill effects - even Japanese National treasures that are hundreds of years old are routinely removed from their old backing and reapplied to new backing material. Instant ink does not have this property and will run (bleed) when wetted. This means that work created with instant ink cannot be mounted using urauchi and attempting to do so will ruin the work.
Instant ink has its place. There is no doubt about this. And it is perhaps a good idea to try the instant ink to get a feel for how it looks and feels. This may help you to get a feel for what to look for when preparing your own ink.
Japanese Calligraphy is very much a mental process. In Japan, a large amount of time is spent training the calligrapher to develop the mental discipline required for the art. Use the grinding of the ink as meditation. I believe you will find that in the first works there are many different things to remember and many things are happening at once. To handle this even at the beginning stage requires mental effort. Some Japanese Calligraphy schools even claim that calligraphy staves off Alzheimer's as it exercises the mind to such an extent. Whether this is true or not, it is certainly true that calligraphy is mostly mental and concentration and a centering of the mind is very important to accomplish all that needs to be done.
To further this, I do not mind if you use newspaper, a cheap brush and instant ink to practice the mechanics of a stroke. Practice with these, but when you are done with practice put these away and concentrate all of your energy on doing excellent work. Use your good paper, your good brush, and use the grinding of the ink to prepare yourself. Feel in your mind what you are about to create. And then create it.
Initially we are going to focus much of our attention on the mechanics. And we are going to focus on some tricks that will help us along the way. One trick that we are going to employ is using the grinding of the ink to take us from hustle and bustle of the rest of the day to a state of calm and confidence. We will employ both the act, the odor, and visual cues to get us game ready.
Samples of Ink Sticks
It is not possible to tell if an ink stick is good without grinding it. For this reason it is important to purchase ink from a reputable source. This way the pricing of the ink stick will reflect the quality.
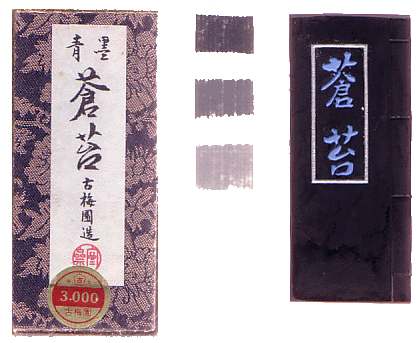
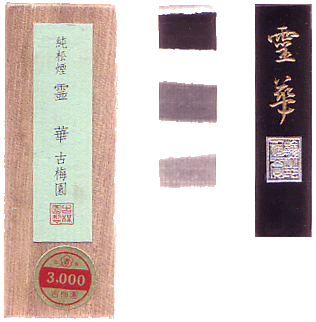
All ink when thick will be jet black. However, when the ink is made thinner then colors will be apparent that range from blue to brown. This is especially important in advanced works. Note that in some of the samples below a sheet showing the ink's color using three grades of ink thickness is included. The lighter ink thicknesses show these natural colors.
|
|
| Not all ink is pure black. This stick has a distinct bluish tint which is more pronounced in the lighter shades as seen in the ink strips. |
|
Another very nice ink. |
|
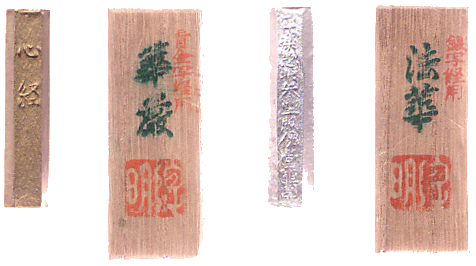
Specialized ink-sticks for writing gold and silver. |
There are many types of ink sticks. This is not for use
with the ink stones that we have shown here. |
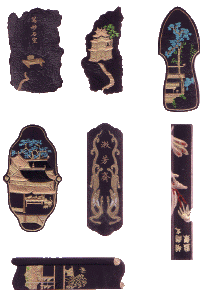
Ink like fine wine does develop special properties when properly aged. However, just like wine, if stored improperly old ink sticks will turn to junk. The reason is that resin was used to bind the ash. This needs to be cared for so that when rubbed against the ink stone the friction will melt the resin and release the ink into the water. Old ink sticks that have not been properly stored are like petrified wood and will not release the ink when rubbed. Worse yet, such hard ink sticks will cause undue wear on the ink stone and may damage the surface. Examples of these ink sticks are shown below.
| These old and irregular shaped ink sticks are only good for decoration. Using these will damage the ink-stone and frustrate the artist. These were purchased from a street corner vendor in Kyoto and were sitting out in the hot sun. Only if the ink sticks had been kept in temperature regulated and stable conditions could they age in a way that would make them superior for use. But, as with wine left sitting in the sun for ages, these have been destroyed. |
|
|
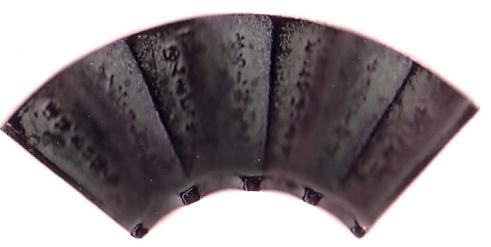
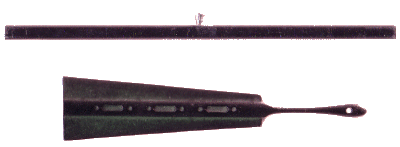
| This is a close-up of a sumioki (Sumi Rest). This has an accordion surface like a folding fan. This shape allows that if there is a little water on the ink stick the water will either run off or dry quickly. |
The stiffness of the brush depends on the type of hair that is used to make the brush.
When purchasing a brush, one will find brushes that have been shaped to a point with a weak glue and brushes that are left in their natural form. This glue is called keshou nori 化粧糊. Brushes that have been shaped using this glue (some call it a starch) is called goumou fude 剛毛筆 (stiff bristles). Brushes that are left in their natural shape are called juumou fude 柔毛筆 (soft bristles).
Leaving part of the glue on the brush will limit the size of characters that you can write and the brush will be easier to wield. Think of this as training wheels for the brush - one is limited to how much of the brush one can use and so one is limited in both the degree of freedom and in the size of the characters that one can write. On the other hand this lack of flexibility also forces one into the strict motions required for kaisho font which is the block script that we will start with in the next lesson.
With the brushes that have been shaped with glue, do not remove all of the glue when washing. Leave at least half the brush with the glue. One exception is with the youmou fude with which all of the glue can be removed and the entire brush can be used for calligraphy.
You will notice that the brushes I use in the samples are gray. This is because they have naturally absorbed the ink - when the brushes were purchased, the original color of the bristles was white.
For the beginner a brush that is 9-10 inches (about 24 centimeters) in length is appropriate. As an example, a 9 3/4" brush (from brush tip to the end of the handle) will have bristles that are about 1 3/4" long. This is an average bristle length. Bristles that are 2 1/4" in length are considered long. You will find brushes with this bristle size difficult to use.
youmou fude 羊毛筆 is literally translated as "sheep hair brush", but it is not actually sheep - it is goat. There is an interesting story behind this, but notice that you will find Japanese brushes called sheep or goat and the fact of the matter is they are all goat hair brushes.
Another type of brush is called kengou fude 兼豪筆 which is a mixture of animal hairs. Either youmou or kengou brushes are recommended for the beginner. In most of the examples our students are using a kengou fude.
Inexpensive brushes will have several problems including bristles falling out into the ink stone and onto the artwork. A bristle removed from an artwork will leave a telltale sign. The other problem is that new brushes take getting used to and inexpensive brushes will have an abnormally short lifespan wasting the artist's time.
When using a brush with a mixture of hairs, one must get used to that particular brush. This can take months of using the brush every day. If you are buying inexpensive brushes then this process must be endured for each brush even when supposedly the exact same brush is purchased. With quality brushes, the brushes are consistently made and one can more readily make the transition from one brush to the next.
From a reputable source a quality brush will be expensive. Similarly the more inexpensive the brush, the lower the quality. Though from an unknown or unreliable source the price will not necessarily reflect the quality.
A brush must be thought of something that has a short life. Hope as we might, it will not be a life-long companion. We will talk about ways to use and care for the brush so that its lifespan is maximized, but the brush must still be considered something that is transient. This is not to imply that a brush does not deserve respect and reverence, but one must try many brushes. One must try the $4 brush to understand how it differs from a $20 brush. Certainly this process must be repeated time and again before one should be willing to commit to a brush that is in the hundred or several hundred dollar range.
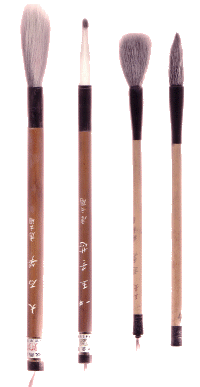
| These are good samples of youmou fude. The brush on the left has longer bristles and will be more difficult for the beginner to master. The brushes on the right are of medium size. The brush second from the left has a weak glue to stiffen the brush making the brush easier to use. |
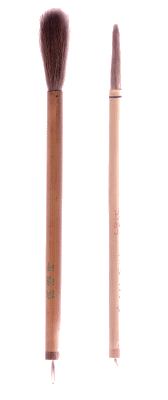
| Brush called ko-fude is used for kana calligraphy. This brush and kana calligraphy are unique to Japan. |
|
|
|
This is a fudeoki or Brush Rest which is used to rest the wet brush while not in use. Anything can be used for this purpose as it is only important that the brush be held off the table and kept from touching other things. |
Preparing the Brush
After purchasing a brush, one must prepare it before first use. For a youmou fude do the following (note that this will be difficult with other brushes or cheaper brushes):
1) With the fingernail of the thumb, run the nail from about the middle down to the tip of the brush. Doing this will loosen the bristles.
2) Rotate the brush between the thumb and forefinger and squeeze the tip of the brush. Continue this for a bit rotating and squeezing. This will further loosen and separate the bristles.
3) Dip the tip of the brush in water and then press gently against paper as if writing with the brush. This will further separate and loosen the bristles.
4) Rinse the entire brush in water and use your fingers to squeegee off the excess. Repeat this several times. The water will run off of the glued part of the brush, but the area that we have been working with will absorb the water. As we rinse and repeat this will further remove the glue from this area only.
The goumou fude is usually much stiffer. To save effort, put the brush in water with only half the bristles submerged. Leave this overnight (twelve hours) and then proceed as above.
Important: Brushes are sold with a hollow plastic bristle cover that protects the bristles. This cover should not be used once the brush is used. The reason is that when replacing this cover, bristles will be bent and damaged. This plastic cover will also hold water on the bristles and on the area where the bristles are attached by glue to the brush. Both of these are very harmful to the brush and will dramatically shorten the lifespan of the brush. Do not store brushes with this plastic bristle cover.
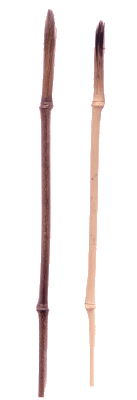
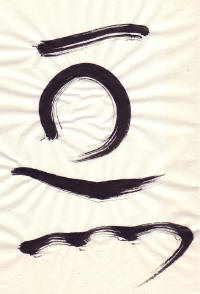
There are many styles of brushes. In the sample below I use a brush made from bamboo which creates parallel lines with an aesthetic effect. I have done works using a chopstick with a frayed end which also has a very nice effect.
While brushes can be made from things natural and man-made, the brushes we will be looking for will be natural brushes that have several properties. A good brush will have a nice shape when inked - there should be no frizzled bristles. And when using the brush, the bristles should not fall off into the ink well or into the artwork. This is less important for the inexpensive brushes used in practice, but as you go along you will want brushes that keep their bristles.
When visiting an art store it is very difficult to tell which brush will work well and which brush will fail. Most brushes are sold "glued" into a nice shape. They look nice like this, but this can also cover faults like bristles that are not secure.
To begin with I suggest using 9 1/2" (23-25 cm) mixed natural hair kengou fude brush with 1 3/4" (4.5 cm) bristles.
|
|
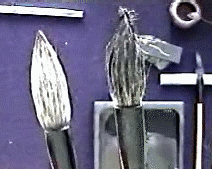
| Both brushes shown here are inked. The brush on the left has a nice shape, the brush on the right is frazzled. The brush on the right is an old brush and is not used any more. The mistake of some beginners is to use such a brush to produce a kasure effect. For the brush on the right the only thing remaining to be done is to thank the brush for its years of service and to lay it to rest. |
The paper that we will be using is Japanese Paper called washi 和紙. The standard paper size that we will use is 9" W x 13 1/8" H (24.2 cm W x 32.2 cm H). This size is a standard size and is called hanshi 半紙.
Japanese paper is made by dipping a screen into a slurry of fiber. The screen side of the paper and the top of the paper have a different texture giving the paper two distinct sides.
One side is the side that is against the screen. This side is rough. The other side is created by a successions of dips into a slurry and having the excess thrown off adding a fine layer to the paper. This side is smooth. The side that we will use for calligraphy is this smooth side.
So before you begin feel both sides of the paper. Note that one side is smooth and one side is rough. The side that we will use is the smooth side.
For background on washi and how it is made, please see Washi - Japanese Paper
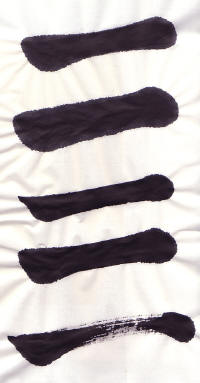
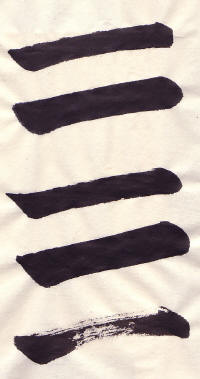
Experiment with several papers and get a feel for the differences. In the samples below we have one paper that has little sizing and so the ink blots easily and we have another paper with more sizing and we see that it is more forgiving when the ink is thin or when the brush stroke is slow.
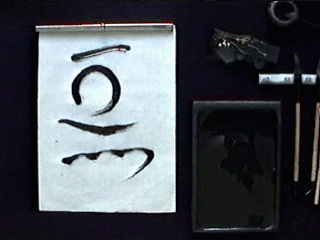
Below, the paper on the left is un-sized which causes the paper to absorb ink like a blotter. The paper on the right is sized which results in crisp lines. The first two lines drawn in each sample use a thinner ink with the first line drawn quickly and the second line drawn slowly. The next two lines use a thicker ink and again the first line is drawn quickly and the second line is drawn rather slowly. The final line is drawn quickly with just the right amount of ink to see how the paper acts with a kasure stroke.
 |
 |
|
Un-sized paper |
Sized paper |
The paper on the left is really not suitable for calligraphy. It would be great for wiping up spills however.
When first trying a paper, gradually increase the thickness of the ink by further grinding the ink and the blotting should go away. If it does not you might want to try a different paper. The following videos show the above samples being created. This is nice to get a feel for how the line appearance differs when a slower and faster stroke is used.
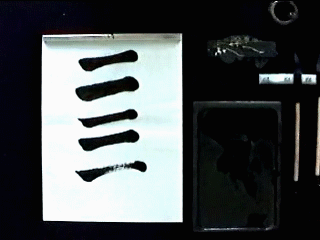 |
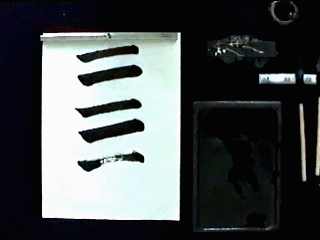 |
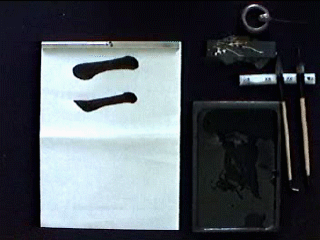
Below is one more sample showing the difference between thin ink (top line) and thick ink (bottom line) on relatively un-sized paper. The rounded end is called "dango" which is a type of dumpling and this undesirable effect is caused when ink is too thin for the paper.
Sitting Position
Correct posture and sitting position are very important. Note how the student is about a fist's width away from the table and the elbow is about the same width from the top of the table. The back is straight with the left hand holding the bottom corner of the paper.
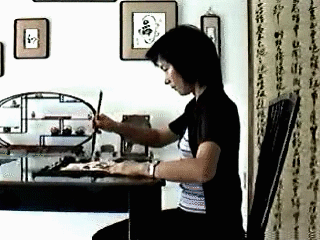
Proper Sitting Position
The ink stick should be held firmly. The ink
stick is rectangular and should be held as shown above. The surface of the stick
should be flat on the stone and if your motion is perfect the ink stick will
remain perfectly rectangular. Do not grind the ink stick at an angle.
One should also be careful when apply the ink stick to the ink stone. If one
applies too much energy the result can be spattering of the ink on everything.
Gently, with a little pressure applied, move the ink stick back and forth in large strokes across the riku (land) area of the suzuri. The entire land area should be used using long, slow, big strokes. The motion should certainly not be quick with short strokes, rather the strokes should be long and contemplative.
Do not grind the ink stick in the umi (ocean) area.
The following video shows strokes that are too quick and short. The motion should use large strokes in a slightly oval pattern. Note the difference between the Sensei's long slow strokes and the student's short quick strokes.
When the ink on the riku (land) is sufficiently thick, push the ink with the ink stone into the umi (ocean). Add several drops more of water and begin the process again. Repeat this until one has enough ink.
It is very important to not add a bunch of
water at once and do not try to make all of the ink in a single batch. The ink should be made a
little at a time.
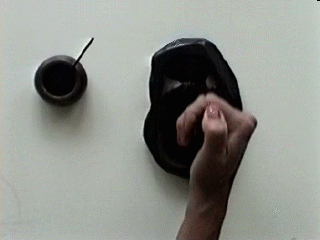
Grinding Ink Student 2 Critique
Please pay particular attention in the video to the difference in the strokes. The student's stroke are short and quick, the Sensei uses a longer and slower stroke.
|
Grinding Ink Student 2 Critique - Frame by Frame Analysis
|
|
|
1. Do not grind the ink stick at an angle. |
2. There is a slant on the end of the ink stick - it is not being ground perfectly perpendicular to the stone |
|
3. One can see that the smallest dimension of the ink stick is towards the top of the ink stone. |
4. Some prefer to grip the ink stick by the top in this manner. |
|
5. I prefer a more solid grip. While a lot of pressure is not applied one can end up doing a lot of grinding with larger work. For this reason a comfortable and solid grip that is not going to cause strain on the wrist is important. |
6. The finished ink is moved from the riku to the umi area by lighting scraping the sumi from the riku to the umi. |
Holding the Brush
Hold the brush in the middle. Then move the hand down a little towards the bristle end of the brush. The brush should rest between the index finger and the middle finger. With the side of the middle finger against the brush. Hold the brush in position with the thumb. The ring finger and the little finger are held naturally against each other and the middle finger.
The hand is also relaxed and cupped such that an egg can be held in the palm.
The brush should be held almost vertically. There is a slight angle of the brush to the right and towards you.
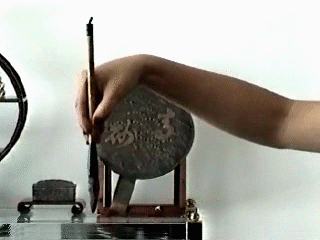
To emphasize proper technique, the brush is positioned between the middle and index finger with the thumb holding the brush in place as follows:
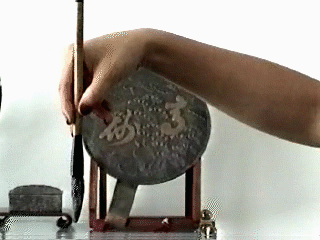
Then the ring finger and small finger and placed next to the middle finger. The ring and small finger do not touch the brush.
The following video shows the correct way to ink the brush and also the correct way to hold the brush. To ink the brush first dip the end into the well which is called the ocean or umi of the ink stone. Excess is then removed on the grinding area of the ink stone which is called the riku or land.
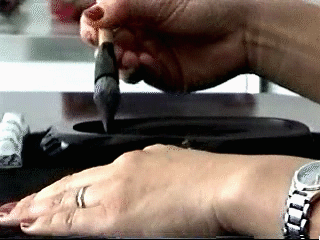
Inking the
Brush Student 1 Video
When first inking the brush, more time is spent thoroughly soaking the brush in the umi (ocean). Here the ink stick might be used to help the brush absorb the ink.
Re-inking the brush will be a dip or two into the umi (ocean) and straightening the brush and removing excess ink on the riku (land).
In subsequent videos we show both the student and the sensei inking the brush. Note the difference. In some cases we edited out students repeatedly inking and re-inking of the brush and excess time spent on this task. Excess inking of the brush is a sign of nervousness or lack of confidence. While it is to be expected in the beginning, you should see yourself progress to being deliberate about the inking and self-assuredly returning back to the task of writing.
If you have the feeling that this ink stone above is too small for the brush and the ink being used, then you have a good eye. Both in grinding the ink and here you can see that the ink stone is better suited towards smaller projects with a smaller brush. On the other hand it is a very nice natural stone and would be well suited to smaller projects.
Putting It All Together
We are almost ready to begin our first writing lesson. The following video shows proper posture, brush holding, and brush inking.
Notice in the image below how the left hand is holding the bottom of the paper in place.
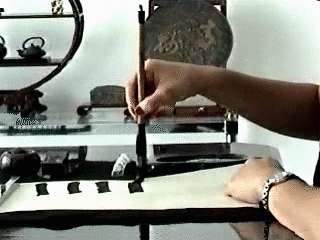
Brush Position
Student 1 Video
We will finish up this section drawing vertical lines. Notice that the start of each of the lines is the same, but the lines are finished in a very different manner. Also notice that the brush strokes almost look exaggerated: These large motions are absolutely necessary for clean lines. We will be stressing this point time and again and I urge you to look for this in the videos.
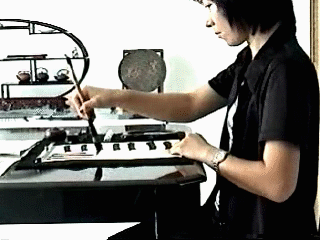
Vertical Lines
Student 1 Video
Below show actual sizes of the last two lines drawn. Notice how the different end motion results in a very different finish to the line. We will discuss these vertical lines in the next lesson.
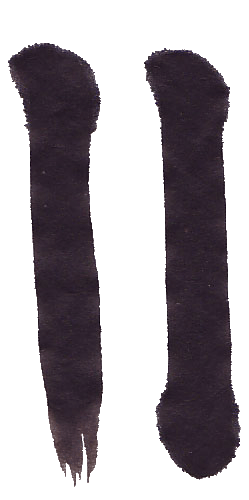
Student 1 Sample
Note in the above example that there is a dango effect in the lines. This is the rounding at each end caused by the ink bleeding into the paper. This is not a desirable effect and thickening the ink as well as moving the brush at the right speed will avoid this. For kaisho, crispness is important and these are not crisp lines.
Finishing the Calligraphy Sessions
Cleaning the Fude
When finished using the brush, the bristles should be cleaned thoroughly. One should take care to wash the bristles and not hold the part of the brush where the bristles are connected to the handle in water for long. One can rinse off the handle quickly. But be careful as it will overly weaken the brush if the area where the bristles are connected to the handle have prolonged exposure to water.
Finally the brush tip should be shaped to a nice point while removing excess water from the bristles.
Brushes should be hung by the loop on their handle. This will keep water away from where the bristles connect to the handle and will maintain the shape of the tip. In this way the life of the brush is prolonged.
I mentioned this before, but I will mention it one more time. Brushes are sold with a hollow plastic bristle cover that protects the bristles. This cover should not be used once the brush is used. The reason is that when replacing this cover, bristles will be bent and damaged. This plastic cover will also hold water on the bristles. Both of these are very harmful to the brush and will dramatically shorten the lifespan of the brush. Do not store brushes with this plastic bristle cover.
Cleaning the Suzuri
When finished using the suzuri, remove the excess ink with a paper towel.
IMPORTANT: Do not let the ink dry before washing.
Then wash the suzuri using your fingers, a soft fabric, or a paper towel. Use plenty of water as all of the ink needs to be removed. Thoroughly dry the stone with a soft cloth or paper towel. Do not use anything that will scratch the surface. The suzuri should then be covered so it will not collect dust and stored in a location where it will not be bumped or damaged.
A suzuri that is treated well will last a lifetime.
Copyright © 2017 Takase Studios, LLC. All Rights Reserved.
