Takase Studios Custom Design Process
Step 1: What to Make?
The first step is deciding what the design will say. Sometimes this is a quote and sometimes it is just an idea. It also helps if you have an idea of the size of the tattoo – is it going to be a small design on your neck or a large design on your back, for example.
You don’t need to worry about the font or even about the layout. These are things we will explore in the first design set. Though if you know you prefer a block font or a cursive font, that certainly helps. If you are not sure then the first step will show a range of fonts. If you are sure then we will focus on variations for the styles you like.
Along with needing to find a font that appeals to you, we would also be looking at the translation. There are always several ways to do a translation and the size of the final work will often time determine the number of characters that can be used. At this initial stage, we can look at the complexity of the characters as well as the number of characters required for a translation.
If you are still looking for ideas or just want to see examples of what is possible, visit our stock image site StockKanji – Japanese Calligraphy Designs. There you will find samples that range from inspirational words to proverbs, haiku, and even to names in Japanese.
Step 2: Refining the Design
For the second set of samples, we should have a font preference, a layout, and a translation. Though something may not be quite right and we may need a second set of samples to feel comfortable that we are on the right track with the design.
Another important piece of information is the style of the characters. While most will choose Gyousho (Semi-cursive) or Kaisho (Block) for reasons of style and legibility, even between these two styles there are many options. The five major font styles are described at Glossary of Terms – Kanji.
We keep doing variations where you can choose which designs you like and we continue in this fashion until the design is exactly what you want.
Step 3: Finalizing the Art
For all of the art we create, we follow the same process of showing samples, getting feedback, and showing new samples based on the feedback. This is continued until the design is just right.
The final step is to create the art. And this step depends on the art being created. Whether we are creating art for individuals, commercial art or personal tattoo designs, the final art is always as close as possible to the final sample as possible.
A Sample Design Session
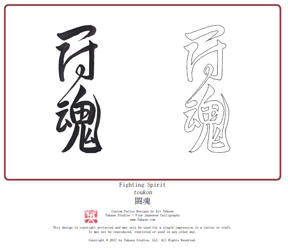
Several years ago a visitor to my website saw a design we had for Fighting Spirit which in Japanese is 闘魂 and is read toukon.
“Fighting Spirit”
toukon
闘魂
Tim: “I am very interested in your fighting spirit – Toukon character that you have on your website and was wondering if you had any different versions of the character.”
Eri: “Thank you for your kind inquiry. I would be delighted to work with you on a custom design for Fighting Spirit and can offer samples in a variety of fonts and would work with you to create a custom design that is just for you.”
Tim placed the order and in the first email, we had completed the first step having decided on the Japanese translation to use. The next step was to get a feel for the type of font most appealed to Tim. So the first sample set featured a variety of fonts.
Here are the samples that I sent. These are all Fighting Spirit (toukon) with the only difference being the font used.
Eri: “Hi, I have attached my initial thoughts for the design. The original font you saw was a block font so here I am focusing on the other fonts. Sample (1) is a semi-cursive font. Sample (2) is a mixed font. Samples (3) and (4) are original cursive designs and sample (5) is a cursive font. Please let me know your thoughts and I look forward to your reply.”
Tim: “My two favorites are no’s 5 and 2. Are there any other variations on the two fonts as its very difficult to decide between them at the moment and is it possible to make the design ‘flow’ together a bit more rather than having two separate parts?”
Based on his feedback, I created the follow sample set:

Tim: “I really like the bottom character of no’s 8 and the top 11.”
I felt we were close so I sent a design that I felt both balances and combines the two designs:
Eri: “I have attached my idea for the final design. Please let me know your thoughts and also, please let me know what size you would like for the final design? You have ordered a design up to 5 inches.”
Tim: “This is just right. I want the final to be 4 inches. Thank you, Eri.”
NOTE: Actually Tim selected a different design, but this was an original unique design for Tim. So here is an alternate design so you can see the quality of the final designs we send.
Click on image to download final design